
Key Takeaways
- Start with the simplest checks first: verify the wall outlet works, test your surge protector, and ensure all power cables are firmly connected before opening the case.
- The power supply unit is the most common hardware casualty after an outage—the returning surge often damages internal components like fuses and capacitors.
- A power drain reset (holding the power button for 20-30 seconds while unplugged) resolves many post-outage startup issues without any hardware replacement.
- Your hard drive or SSD is probably fine even if the PC won’t boot—drives typically survive power events and can be connected to another system for data recovery.
- Stop troubleshooting immediately if you smell burning, see scorched components, or your circuit breaker trips repeatedly when plugging in the PC.
Why Your PC Won’t Turn On After a Power Outage
You’ve probably experienced it before: the lights flicker, your screen goes dark, and when power comes back, your desktop or laptop refuses to start. This unexpected loss of power, often called a power cut, can cause electronic devices to shut down suddenly. Whether it’s a summer thunderstorm rolling through your neighborhood or unexpected grid maintenance, power outages happen. But the outage itself isn’t usually the problem.
The real threat comes when electricity returns. Power restoration often brings voltage spikes, brownouts, and what electricians call “dirty power”—rapid fluctuations that stress your computer’s internal components. During major weather events in 2023 and 2024, countless users reported dead PCs not from the blackout itself, but from the surge that followed when their local grid came back online. Many users have experienced the same problem after a power cut, with their PCs failing to turn on or boot properly.
Here’s what’s actually happening behind the scenes:
|
Power Event |
What It Does |
Risk Level |
|---|---|---|
|
Blackout |
Complete loss of power |
Low (unless mid-write operation) |
|
Power restoration |
Voltage spike as grid stabilizes |
High |
|
Brownout |
Sustained reduced voltage |
Moderate to High |
|
Voltage surge |
Brief overvoltage spike |
High |
In the majority of cases where a PC won’t turn on after a power outage, the root cause falls into one of three categories:
-
A tripped or failed surge protector that’s no longer delivering power
-
A blown fuse or damaged components inside the computer power supply
-
Damaged voltage regulation circuits on the motherboard
Before proceeding, plug another device into the wall outlet to confirm it has power.
The good news? We’ll work through these possibilities systematically, starting with the simplest fixes that take just minutes.
Immediate Checks: Rule Out Simple Power Issues First
Before you grab a screwdriver or start worrying about expensive repairs, spend 5-10 minutes on these basic checks. Many “dead” computers are actually victims of failed power strips or tripped breakers rather than internal damage.
Confirm household power is fully restored:
- Check other devices on the same circuit—lamps, phone chargers, anything plugged into nearby outlets
- Walk to your electrical panel and verify no breakers are in the tripped (middle) position
- If other devices on the same outlet aren’t working, the issue is your home’s wiring, not the PC
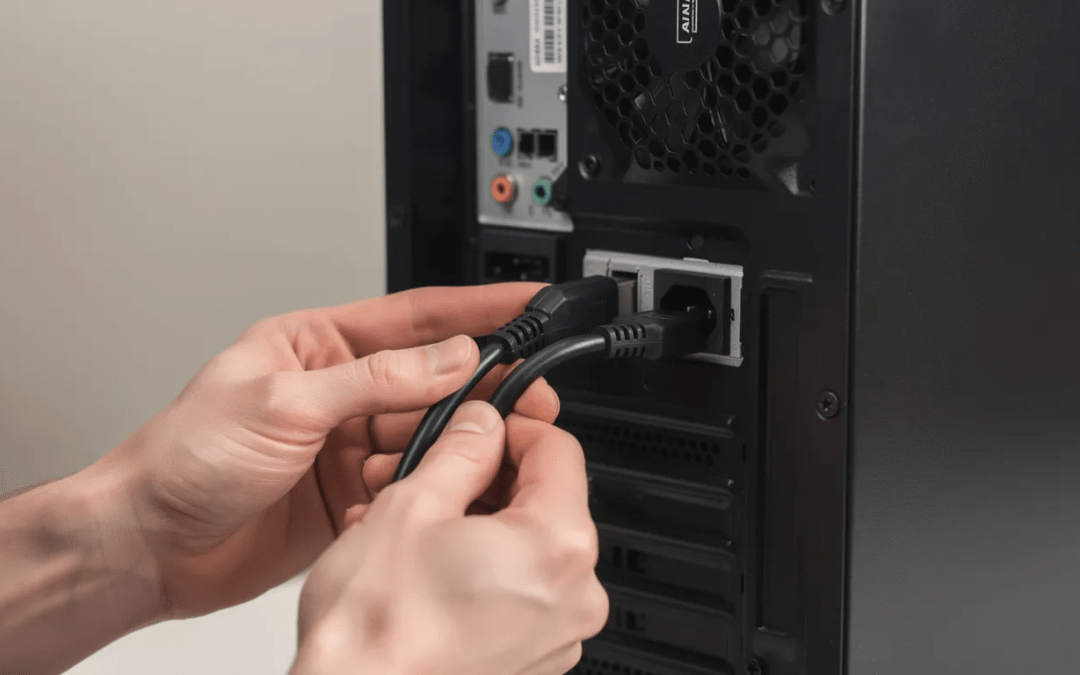
Inspect your power cord and connections:
- Ensure the power cable is firmly seated at both ends—the wall outlet and the back of your PSU
- Look for visible damage: burn marks, melted plastic, or a kinked cord
- If the cable looks damaged, stop using it immediately
Test the wall outlet directly:
Plug a known working device (a lamp or phone charger) into the same outlet your PC uses. If that device doesn’t work, try a different outlet on another circuit entirely.
Inspect and reset your surge protector or power strip:
Most surge protectors have indicator lights showing power and protection status:
-
A green light typically means protection is active
-
A red light or no lights often indicates the unit is dead or protection is exhausted
-
Look for a reset button (usually near the on/off switch) and press it firmly
If your surge protector shows no signs of life, temporarily plug the computer directly into the wall outlet for testing. This bypasses a potentially failed strip—just remember this removes surge protection, so don’t leave it this way permanently.
If your PC suddenly shows fans spinning or lights after changing outlets or bypassing the strip, you’ve found your culprit. Replace that surge protector before reconnecting your system.
Perform a Power Drain Reset (Desktop and Laptop)
Sometimes a PC that won’t turn on after a power outage is simply confused. The sudden loss and restoration of power can leave residual charge trapped in capacitors, causing the PSU or motherboard to enter a protective state. Unexpected shutdowns often leave residual electricity in the capacitors, preventing a boot. A power drain reset clears this condition and costs nothing to try.
To perform a power drain reset, unplug the power cord and hold down the power button for 30 seconds. This helps drain any remaining power from circuits and memory. Note that capacitors can store dirty power or static electricity after a surge, which may prevent a boot.
If the reset does not work, let the PC sit unplugged for several hours before trying again.
Desktop PC Reset Procedure
- Switch off the power supply using the rear toggle switch (set it to the 0 position)
- Unplug the power cord from the wall outlet completely
- Disconnect all external peripherals except your keyboard, mouse, and monitor
- Press and hold the power button for 20-30 seconds—this drains residual power from the motherboard
- Reconnect the power cable directly to a known-good wall outlet
- Flip the PSU switch back to I (on position)
- Press the power button normally and wait a few seconds
Laptop Reset Procedure
- Unplug the AC adapter from both the wall outlet and the laptop
- If your laptop has a removable battery, take it out completely
- Press and hold the power button for 20-30 seconds
- For sealed-battery ultrabooks, simply hold the power button with everything disconnected
- Reconnect only the AC adapter (leave the battery out if removable)
- Attempt to power on
If this procedure brings your system back to life, no hardware replacement is needed. However, the fact that a brief power outage caused this issue suggests your setup could benefit from better surge protection—more on that later.
Check External Hardware: Monitor, Cables, and Peripherals
Here’s a scenario that catches people off guard: the PC is actually running, but the black screen makes it look completely dead. Before assuming the worst, verify whether your computer is truly off or just not displaying anything. Sometimes, a blue screen may appear instead of a normal boot, indicating a system error caused by the outage.
Signs that your PC is actually powering on:
-
Case fans or CPU cooler fans spinning
-
Any LEDs on the motherboard visible through the case window
-
Hard drive activity sounds (clicking or spinning)
-
Keyboard lights responding (try pressing Caps Lock or Num Lock)
-
Beep codes from the internal speaker
If you notice any of these signs of life, your PC’s core hardware may be fine—the issue might be your display chain.
Rule out monitor and cable issues:
|
Check |
What to Do |
|---|---|
|
Monitor power |
Verify the monitor’s power light comes on and the power cord is seated |
|
Monitor input |
Unplug the video cable and see if the monitor displays “No Signal” or its menu |
|
Video cable |
Try a different HDMI, DisplayPort, or VGA cable |
|
Input source |
Cycle through the monitor’s input options (HDMI 1, HDMI 2, DisplayPort, etc.) |
|
Second display |
Connect the monitor to another device like a laptop to confirm it works |
For desktop PCs with a discrete graphics card:
If your CPU has integrated graphics (most Intel and some AMD processors), try removing the GPU entirely and connecting your monitor to the motherboard’s video output instead. This tests whether the graphics card was damaged by the surge.
Disconnect non-essential USB devices:
A damaged external hard disk, USB hub, or webcam can cause boot failures by shorting power lines or hanging the startup process. Unplug everything except keyboard and mouse, then test again.
If you still can’t get your PC to turn on and need to recover your data, consider putting the hard drive in another computer to access your files.
Diagnosing the Power Supply Unit (PSU)
The power supply is statistically the most likely component to fail after a power outage or surge. Its job is to absorb the brunt of electrical irregularities, and sometimes it sacrifices itself to protect everything else. Even beginners can perform basic PSU diagnostics without specialized tools. One way to check if the power supply works is to use the Built-In Self-Test (BIST) button found on some modern desktops; pressing it should light up an LED if the unit is still functional. If the power supply is faulty, the rest of the computer components will not work at all.
Signs of a Failed PSU
-
Absolutely nothing happens when pressing the power button—no fans, no lights, no sounds
-
A faint burnt or electrical smell near the PSU exhaust vent
-
The PSU fan doesn’t spin even momentarily during a power-on attempt
-
No standby LED on the motherboard (the small light that stays on when the PC is plugged in but off)

Simple Non-Invasive Tests
Before anything else, double-check the obvious:
-
The rear PSU switch is set to I (on), not 0 (off)
-
Try a different IEC power cable (the standard “kettle cord” used by monitors and many electronics)
-
If your unit has a self-test button, press it and watch for the fan to spin briefly
The Paperclip Test (Advanced)
This test determines whether a PSU can turn on at all. With the PSU disconnected from all components, you bridge the green wire (PS_ON#) and any black wire (ground) on the 24-pin connector—this can be done by putting a jumper between the two wires. If the PSU fan spins, the unit isn’t completely dead.
Only attempt this if you’re comfortable with basic electrical safety. This test doesn’t confirm the PSU can deliver stable power under load—just that it can activate.
Best Confirmation Methods
The most reliable way to test a PSU is swapping in a known good power supply from a working PC with matching wattage and connectors. If the system boots with the replacement, your original PSU failed.
Alternatively, a digital PSU tester or multimeter can verify that the +12V, +5V, and +3.3V rails are within specification. Voltages significantly outside the ±5% tolerance indicate a failing unit.
If a verified good power supply still produces no lights or fans, the problem has moved downstream to the motherboard or other components.
Motherboard, CPU, and Fans: Checking for Deeper Damage
When power delivery checks out but the PC still won’t start, suspicion falls on the motherboard’s power circuitry. Surges can damage voltage regulator modules (VRMs) and controller chips without leaving visible marks.
Reading Motherboard Indicators
Most motherboards have a standby power LED that illuminates whenever the PSU is connected and switched on—even when the PC itself is “off.” Look through your case window or side panel for this small light, often near the 24-pin connector or RAM slots.
Many modern boards also feature diagnostic LEDs labeled CPU, DRAM, VGA, and BOOT. If one stays lit during a failed startup attempt, it indicates where the POST process is stalling. Consult your motherboard manual or the manufacturer’s website for specific meanings.
What Fan Behavior Tells You
|
Fan Behavior |
Likely Cause |
|---|---|
|
Fans never spin at all |
Motherboard not sending power-on signal, or dead PSU |
|
Fans spin briefly then stop |
Short circuit detected, CPU protection triggered, or RAM issue |
|
Fans spin continuously but no display |
GPU, RAM, or BIOS problem (system is running but not completing POST) |
|
Cooling fan runs at full speed |
Motherboard failing to read sensors or control fan speed |
Minimal Hardware Test
Strip your system down to isolate the problem:
- Disconnect all drives (SSD, HDD, optical)
- Remove all USB devices
- Remove expansion cards except the GPU (unless using integrated graphics)
- Leave only: motherboard, CPU with cooler, one RAM stick, PSU, and GPU if needed
- Attempt to power on and observe fan/LED behavior
CMOS Battery Reset
An abrupt power loss can corrupt BIOS settings, preventing the system from completing POST. Resetting the CMOS clears these settings:
- Power off and unplug the PC completely
- Locate the small coin-cell battery on the motherboard
- Remove the cmos battery and wait 5-10 minutes
- Alternatively, use the clear-CMOS jumper if your board has one
- Reinstall the battery, reconnect power, and test
A CMOS reset returns all BIOS settings to defaults, including boot order and XMP/DOCP memory profiles. You may need to reconfigure these after a successful boot.
Setting realistic expectations: If there are no lights and no fans with a verified working PSU, the motherboard is almost certainly damaged. CPU failures from surges are uncommon compared to motherboard or PSU failures, but can’t be ruled out entirely without professional testing equipment.
Special Steps for Laptops After a Power Outage
Laptops present unique challenges because they rely on an AC adapter and internal battery working together. A power surge can damage either component independently.
Testing the AC Adapter
-
Check for an LED on the power brick—it should light when connected to a working outlet
-
Inspect the entire cable for fraying, kinks, or heat damage, especially near the connector tip and where the cord meets the brick
-
If you have access to a compatible spare adapter with matching voltage and wattage, test with that
Testing Without the Battery
For laptops with removable batteries:
- Shut down completely and unplug the AC adapter
- Remove the battery from its compartment
- Reconnect only the AC adapter to a known-good outlet
- Attempt to power on
If the laptop runs on AC power alone but won’t start with the battery installed, the battery may have been damaged and needs replacement.
Sealed-Battery Ultrabooks
Modern ultrabooks with non-removable batteries require a different approach:
-
Disconnect all power sources
-
Press and hold the power button for 30-60 seconds
-
Some manufacturers have a pinhole reset button on the bottom—check your manual
-
Reconnect the AC adapter and attempt to boot
If a known-good adapter doesn’t power the laptop and there are no lights whatsoever, the internal power circuitry or motherboard likely sustained electrical damage.

Protecting Your PC from Future Outages and Surges
Once your PC is working again (or you’ve replaced the failed components), it’s time to prevent a repeat of this experience. The cost of proper protection is far less than replacing a dead system.
Surge Protectors: The Minimum Protection
Not all power strips are surge protectors. A genuine surge protector contains metal oxide varistors (MOVs) that absorb excess voltage—but these wear out over time.
What to look for:
-
Joule rating of at least 1,000-2,000 for basic protection
-
Indicator lights showing protection is active (not just power)
-
Replace every 3-5 years or after any major surge event
-
Avoid cheap no-name strips that may have inadequate protection
Surge protectors can silently fail. The strip continues delivering power even after its protection components are burned out. Check those indicator lights regularly.
UPS: Battery Backup and Surge Protection Combined
UPS: Battery Backup and Surge Protection Combined
A UPS (Uninterruptible Power Supply) provides both surge protection and battery backup, giving you time to save work and shut down gracefully during an outage.
|
UPS Type |
How It Works |
Best For |
|---|---|---|
|
Standby/Offline |
Switches to battery when power fails |
Basic home PCs |
|
Line-Interactive |
Corrects minor voltage fluctuations |
Gaming PCs, home offices |
|
Online/Double-Conversion |
Continuously regenerates clean power |
Servers, critical workstations |
For most desktop users, a line-interactive unit with 10-15 minutes of runtime provides an excellent balance of protection and cost.
Choosing a Good Power Supply
Your PSU is the first line of defense against unstable power. Investing in quality pays off:
-
Look for units from reputable brands with proper certifications
-
Ensure full protection features: OCP, OVP, UVP, SCP (overcurrent, overvoltage, undervoltage, short-circuit protection)
-
Higher efficiency ratings (80+ Gold or better) often correlate with better component quality
-
A known good power supply with decent “hold-up time” handles brief dips without shutting down
BIOS Power Settings
Most motherboards have a “Restore on AC Power Loss” or “AC Back” setting in BIOS/UEFI. Options typically include:
-
Stay Off – PC remains off until you press the power button
-
Power On – PC automatically starts when power returns
-
Last State – Returns to whatever state it was in before the outage
For always-on machines like home servers, “Power On” ensures automatic recovery after outages.
Backup Your Data
No amount of surge protection guarantees safety. Maintain current backups on an external drive or cloud service so that even catastrophic hardware failure doesn’t mean losing irreplaceable files.
When to Stop and Call a Professional
DIY troubleshooting has limits. Knowing when to stop protects both you and your hardware from further damage.
Red Flags That Demand Professional Help
Stop immediately and consult a technician if you encounter:
-
Strong burnt or chemical smell from the PSU, motherboard, or outlet
-
Visible scorching, bulging capacitors, or melted plastic anywhere in the case
-
Your circuit breaker trips repeatedly when plugging in or powering the PC
-
Electric shocks when touching the case (indicates grounding failure—serious safety hazard)
When Pro-Level Tools Are Needed
Some diagnostics simply require equipment and expertise beyond typical home setups:
-
Testing intricate motherboard circuits for microscopic damage
-
Determining whether a CPU or GPU survived when the board shows no obvious signs
-
Professional data recovery from drives that won’t mount normally
-
Repairing or reflowing damaged solder joints
What to Tell the Technician
Prepare this information before your repair appointment:
-
PC model or full custom parts list (CPU, GPU, motherboard, PSU brand/wattage)
-
What happened during the outage: duration, whether other devices were affected
-
All troubleshooting steps you’ve already completed
-
Any error codes, beep patterns, or diagnostic LED behaviors observed
If your system is under warranty, check manufacturer support documentation before opening the case or swapping major components—some warranties are voided by user repairs.
FAQ
Q1: Can a brief power outage really kill a brand-new gaming PC?
Yes, if the outage is accompanied by a strong surge or repeated brownouts, even new hardware can fail. The power supply and motherboard are most vulnerable regardless of age. What matters more than how new your PC is: the intensity of the surge, your home’s wiring quality, and whether you had genuine surge protection in place.
Q2: My PC powers on but restarts repeatedly after the outage. Is this a power issue or Windows corruption?
It depends on when the restarts occur. If the system reboots before the Windows logo appears (during BIOS/UEFI), the cause is likely hardware: unstable power, failing RAM, or motherboard damage. If restarts begin only when the operating system starts loading, the outage may have corrupted system files. Try Windows Startup Repair, System Restore, or a clean reinstall after backing up your data.
Q3: Are my hard drives and SSDs likely damaged if the PC won’t power on?
Usually not. Storage drives frequently survive even when the PSU or motherboard fails. You can often remove the drive, connect it to another working PC via SATA or a USB enclosure, and access your files normally. Physical drive damage from a single outage is less common than file system corruption from an abrupt shutdown mid-write.
Q4: Is it safe to keep the PC plugged directly into the wall socket all the time?
It works, but it’s not ideal. Direct connections offer no protection against surges and spikes, especially during storms or when large appliances cycle on your circuit. A quality surge protector adds meaningful protection for a small investment. For critical systems or areas with frequent power problems, a UPS is even better.
Q5: How often should I replace my surge protector after power problems?
Surge protector components degrade each time they absorb a spike. As a general rule, replace basic home surge strips every 3-5 years under normal conditions. After a known major surge or lightning event, replace immediately regardless of age. Better units have indicator lights showing when protection has failed—check these regularly and don’t ignore a dead “protected” light.